• Enabling Apple Intelligence on macOS 15.1 (Sequoia) Developer Beta

    I have spent the last week or so being very confused on how to enable the macOS 15.1 Beta onto my M2 MacBook Air. I finally stumbled across the method and it made sense once I found it but it was not very intuitive. There are now two separate macOS 15 beta channels and you will need to open System Settings and navigate to General > Software update > Beta Updates. You will need to choose macOS Sequoia 15.1 Developer beta by clicking on the i symbol to the right.

    Dialog box for Beta Updates on macOS, showing a dropdown menu with options: “Off,” “macOS Sequoia 15.1 Developer Beta” (selected), “macOS Sequoia Public Beta,” and “macOS Sequoia Developer Beta.” Below, an Apple Account is listed with the email “gatewayy@gatewayy.net.” There is a “Done” button.

    Once you have selected the new beta channel you Mac should download the update and install it. Once you have installed the update and logged back in you will not immediately have the limited set of Apple Intelligence features. Apple has made them opt-in in order to not bog down their new Private Cloud Compute infrastructure that they are building out. To join the waitlist you will need to open System Settings once again and navigate to the Siri section there is a new Apple Intelligence & Siri section. You will need to select the Join Apple Intelligence Waitlist… button to proceed.

    Siri settings page featuring “Apple Intelligence & Siri” with a beta label, described as a personal intelligence system integrated into Mac, apps, and Siri. A “Join Apple Intelligence Waitlist…” button is present, with a note below about reserving a spot to experience personalized intelligence.

    Get past the marketing dialog.

    Apple Intelligence setup screen with a beta label. Features listed include “New Ways to Express Yourself,” “The Start of a New Era for Siri,” and “Built for Privacy.” There are “Not Now” and “Continue” buttons at the bottom. A link for “About Apple Intelligence & Privacy…” is also present.

    You are now on the waitlist and you should see a preparing dialog.

    Siri settings page showing “Apple Intelligence & Siri” with a beta label. Description states it is a personal intelligence system integrated into Mac, apps, and Siri. “Apple Intelligence” status is “Preparing.” A note below indicates users will be notified when it becomes available for their Mac.

    It took around fifteen minutes for this to happen and you should see the dialog change to enable Apple Intelligence and you should see a notification informing you that the feature is ready to be enabled. I am assuming that somewhere behind the scenes something regarding Apple’s Private Cloud Compute is being created for your device.

    Now, you will see a few short dialogs giving you a brief overview of the current Apple Intelligence features.

    You are now up and running with Apple Intelligence. It is very much early days and only a very small set of features are available with more to come in the next few months.


  • Auto update your brew casks and formulas

    If you use the popular Homebrew package manager on MacOS you are very familar with running something similar to this command on a regular basis.

    brew update && brew upgrade && brew cleanup

    this type of command informs Homebrew to update it’s list of package versions, locate any that need to be updated, and clean up any left over files generated by there processes. If you remember to run this all the time then it is a pretty quick command, but if like me, you forget to do this for weeks or months at a time it can start to take quite some time to finish it’s maintenance.

    Yesterday, I was looking into ways to automate this process through adding the command to Cron or to have Cron run a shell script or apple script file with the commands in it. After some quick searching on my search engine of choice, Kagi, I found a great Github project called Homebrew Autoupdate.

    The project describes itself thusly.

    An easy, convenient way to automatically update Homebrew.

    This script will run brew update in the background once every 24 hours (by default) until explicitly told to stop, utilising launchd.

    brew upgrade and brew cleanup can also be handled automatically, but are optional flags.

    Notifications are enabled by default using a new, code-signed, universal AppleScript applet.

    https://github.com/DomT4/homebrew-autoupdate

    If you decide to install this project every morning you can look forward to notifications like this.

    Screenshot 2024 07 14 At 8.44.13 am

    Do you already use this project? If you tried it, what did you think? Hit me up on Mastodon or my Contact page so we can discuss it or you can ask me any questions you might have.

  • Determine MacOS version from Terminal (CLI)

    As you may or may not know the way most people determine what version of MAcOS they are running is by clicking on the Apple Menu in the upper left hand corner of the screen and selecting About this Mac. You will see a popup dialog that looks something like this.

    Apple Photos Document
    I am using MacOS’ Dark Mode so you might not see this exact window.

    If you would like a geekier and possibly faster way to determine this you can launch Terminal by either using Spotlight Search (Click the magnifying class (🔍) in your Mac’s Menu Bar or use the hand keyboard shortcut of ⌘(Command)+Space. Once the appliation finsihes launching you will see a window that looks something like this:

    Screenshot 2024 06 12 At 12.41.33 pm
    I have gone a little nuts with customizing my terminal experience so your will most likely look totally different. 🙂

    There are two commands you can now run that will display your MacOS version:

    #Simple Output:
    gatewayy@Swordfish-II ~ sw_vers -productVersion
    15.0
    
    #More detailed Output:
    gatewayy@Swordfish-II ~ system_profiler SPSoftwareDataType
    Software:
    
        System Software Overview:
    
          System Version: macOS 15.0 (24A5264n)
          Kernel Version: Darwin 24.0.0
          Boot Volume: Macintosh HD
          Boot Mode: Normal
          Computer Name: Swordfish II
          User Name: Brett Elliff (gatewayy)
          Secure Virtual Memory: Enabled
          System Integrity Protection: Enabled
          Time since boot: 1 day, 17 hours, 29 minutes

    I keep having to search for this, so I thought I might as well put this down so others can benefit from the knowledge. If you have any questions, thoughts, etc. you can reach me via my Contact page or feel free to DM me on Mastodon.

    Via: SuperUser

  • A nice Windows Task Manager tip I stumbled across this weekend

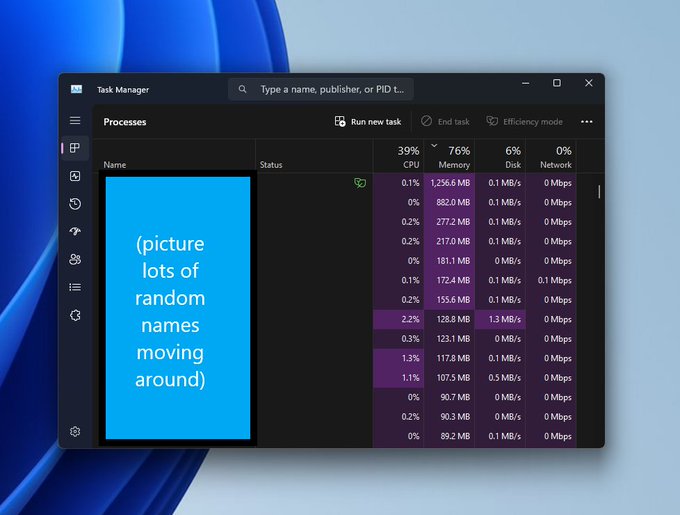
    A screenshot of the Windows 10/11 Task manager application.

    I stumbled across this interesting article this week from The Verge from my beloved NetNewsWire feeds. The article is titled Today I learned you can easily pause the Windows Task Manager to stop apps moving around. The gist of the article is the below quote for those in a hurry. 😝

    I can’t believe I’ve been struggling with apps in the Task Manager randomly moving around without realizing there’s a simple keyboard shortcut to pause the Task Manager and stop its contents in their tracks. Yup, all you have to do is hold down the CTRL key and it will pause the Task Manager on both Windows 10 and Windows 11, and perhaps even older versions of Windows, too.

    Tom Warren via The Verge

    This tip only applies to Windows 10 and 11 and I wish I had known this years ago! At any rate as you can see in the original article at your leisure and I hope it helps out others out there in this wide world.

  • How to correct a WSL VM so that it can use a VPN

    This is a really weird edge case that I came across at work. After an update to Windows subsystem for Linux (WSL) I was no longer able to use my Cisco AnyConnect VPN connection to connect to any of the infrastructure I manage.

    WSL (112) ERROR: CreateProcessParseCommon:782: Failed to translate

    Currently, the only method that I have to use a WSL Virtual Machine (VM) is to use this great third party script so that my VM knows how to actually use a network. I do with Microsoft had an easier way to do this, WSL has no network connectivity once connected to a VPN. 🤦🏻‍♂️

    At any rate, all of these weird tech issues aside with how I choose to SSH into the systems I manage at work, this is how you correct the error WSL (112) ERROR: CreateProcessParseCommon:782: Failed to translate when attempting to use a WSL VM on a VPN Connection. You will need to edit the .profile folder in your home directory (/home/your_userneame_here) and add the following line to the end of the file.

    wsl.exe -d wsl-vpnkit --cd /app service wsl-vpnkit start

    To apply the fix, power cycle your WSL VM with your method of choice. I hope this helps and same you time having to search all over the Internet or watch a Youtube “tutorial” what wastes your time. If you have any questions, etc. hit me up via one of the methods on my contact page. Thanks for stopping by! 🙂